How to add forms
March 2026.
Your Webdoline site is a static website: a folder of HTML, CSS, and image files. This is what makes it fast, cheap to host, and easy to deploy anywhere. But it also means there's no server running in the background to receive and process form submissions.
When a visitor fills out a form, something has to catch that data, store it, and ideally send you an email notification. A static site can't do that on its own, you need a third-party service to handle it.
The good news: there are several excellent options, some of them free.
See the Demo Forms page for a practical example.
Your options at a glance
| Option | Best for | Cost |
|---|---|---|
| Netlify Forms | Sites hosted on Netlify | Free (up to 100 submissions/month) |
| Tally | Embedded forms with custom styling | Free |
| Google Forms | Simple, no-setup option | Free |
| External link | Absolute simplest approach | Free |
For the first 3 options you will need to add a RAW HTML section to a page and paste the code in it:
Option 1. Netlify Forms (if you host on Netlify)
If your site is hosted on Netlify, form handling is built right in. You just add a couple of attributes to your HTML form and Netlify automatically detects it, collects submissions, and sends you email notifications.
Paste this into your page's RAW HTML section in Webdoline:
Newsletter template
<div class="container">
  <p>Sign up to my newsletter.</p>

  <form method="POST" name="newsletter" class="newsletter-form">
    <!-- Next line is required for Netlify, it will detect the form and save responses under "newsletter" (or whatever you put in value) in the Netlify dashboard-->
    <input type="hidden" name="form-name" value="newsletter">

    <input type="text" name="name" placeholder="Your name" required="">
    <input type="email" name="email" placeholder="Your email" required="">
    <button type="submit">
      SUBSCRIBE
    </button>
  </form>
</div>
Contact form template
<div class="container">
  <p>Send me a message.</p>

  <form method="POST" name="contact" class="contact-form">
    <!-- Next line is required for Netlify, it will detect the form and save responses under "contact" in the Netlify dashboard-->
    <input type="hidden" name="form-name" value="contact">

    <input type="text" name="name" placeholder="Your name" required="">
    <input type="email" name="email" placeholder="Your email" required="">
    <textarea name="message" placeholder="Your message" required=""></textarea>

    <button type="submit">
      SEND MESSAGE
    </button>
  </form>
</div>
The hidden form-name input is required, it tells Netlify which form the submission belongs to. Once your site is deployed, submissions appear in your Netlify dashboard under Forms, and you can set up email notifications from there.
The free plan covers up to 100 submissions per month, which is plenty for most artists.
This only works if your site is hosted on Netlify. The form will render on any host, but submissions will only be captured on Netlify.
Option 2. Tally (embedded, works anywhere)
Tally is a free form builder that works independently of your hosting provider. You build your form on Tally's website, then embed it on your page with a snippet of code.
Tally's free plan is generous and the embedded form can be styled to blend into your page.
- Create your form at tally.so
- Click Share → Embed and copy the embed code
- Paste it into an RAW HTML section in Webdoline
It will look something like this:
<div class="container">

<iframe data-tally-src="https://tally.so/embed/RANDOM_ID_GOES_HERE?alignLeft=1&hideTitle=1&transparentBackground=1&dynamicHeight=1"
loading="lazy" width="100%" height="276" frameborder="0" marginheight="0" marginwidth="0" title="Contact Form"></iframe>
<script>SOME_CODE_GOES_HERE</script>

</div>
Submissions are stored in your Tally account and can be forwarded to your email.
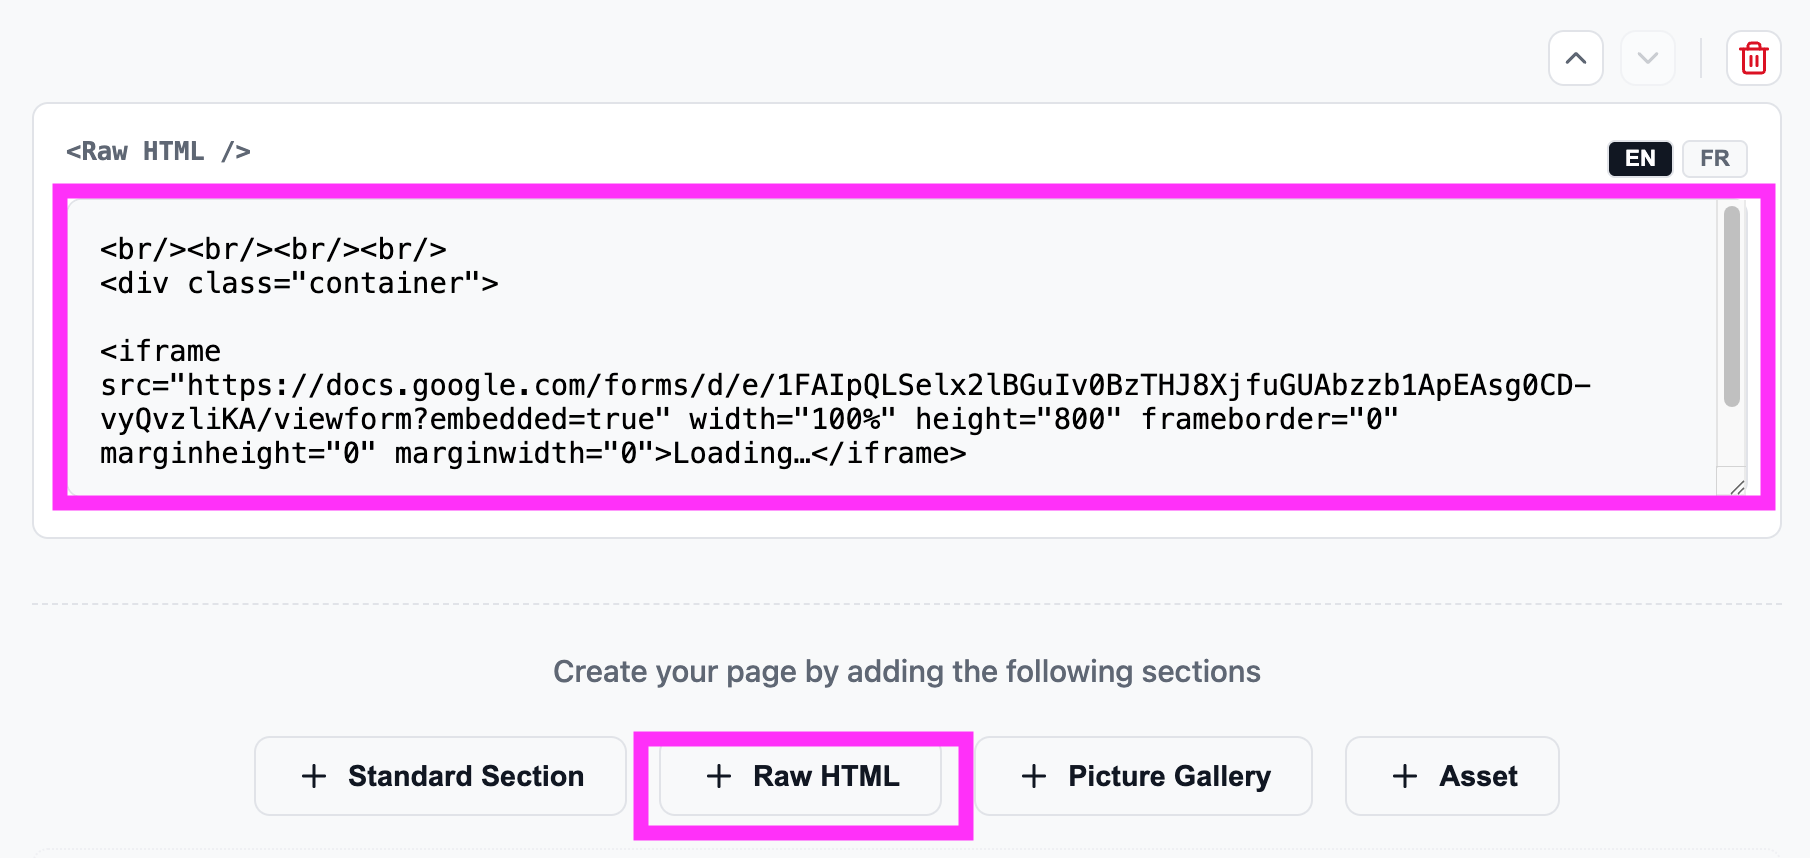
Option 3. Google Forms (embedded)
If you already use Google Workspace or just want the simplest possible setup, Google Forms works fine. It's not the prettiest option, but it requires zero account setup beyond a Google account you likely already have.
- Create your form at forms.google.com
- Click the Send button → Embed tab (
< >) and copy the iframe code - Paste it into an RAW HTML section in Webdoline
<div class="container">

<iframe src="https://docs.google.com/forms/d/e/SOME_ID_GOES_HERE/viewform?embedded=true"
width="100%" height="800" frameborder="0" marginheight="0" marginwidth="0">Loading…</iframe>

</div>
You can adjust the height value to fit your form. 800px works well for a typical contact form with a few fields.
Responses go directly to your Google account and can be viewed in Google Sheets.
Option 4. Link to an external form page
The simplest option of all: skip the embed entirely and just link visitors to your form on a separate page. This works with Tally, Google Forms, Typeform, or any other form tool.
In Webdoline, add a button or text link with the URL of your form. Visitors click through, fill it out, and get redirected back to your site when they're done.
It's not as seamless as an embedded form, but it requires no code at all.
Which option should you choose?
- Hosting on Netlify? Use Netlify Forms, it's the most integrated experience and requires the least setup.
- Hosting on Cloudflare or anywhere else? Use Tally, it's free, works everywhere, and looks the most polished.
- Want zero new accounts? Use Google Forms if you have a Google account, or just link to an external form page.